Accessing Cooley D+O
Cooley D+O through Cooley Connect is a web-based application that can be accessed through your preferred internet browser.
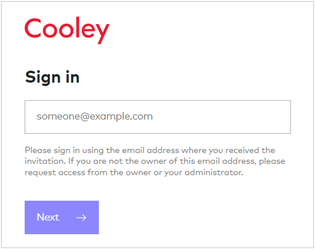
To access Cooley Connect, select the link that has been emailed to you by your company admin team and/or Cooley team. The email will come from Connect (Connect@Cooley.com). Enter the same email address where you received the invitation and select Next.
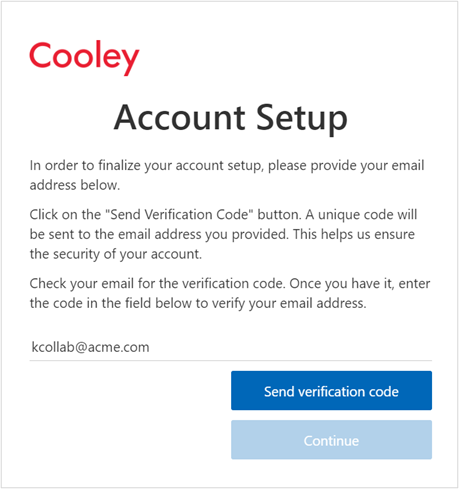
For your first time logging in, you will need to create an account before accessing the portal. Select Send verification code to start the account setup process. An email will be sent to you with the verification code. The email will come from Microsoft on behalf of Cooley Connect (msonlineservicesteam@microsoftonline.com).
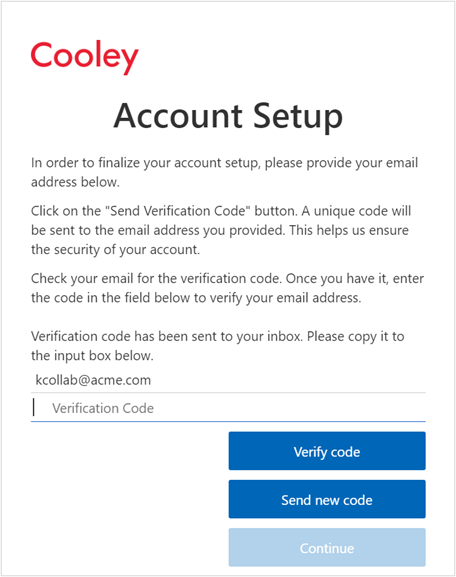
Enter the verification code and select Verify code and then Continue to create your password.
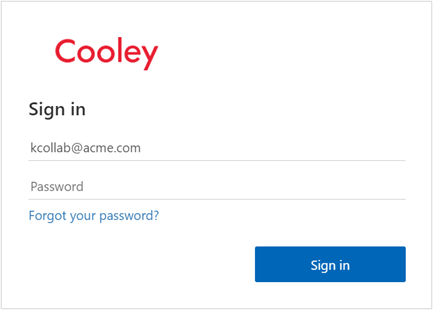
After creating an account, you will be able to navigate to connect.cooley.com and login with your email and password.
When you are signed in, the Cooley Connect D&O Questionnaire Portal will appear.
To access an existing project, click on the Project name.
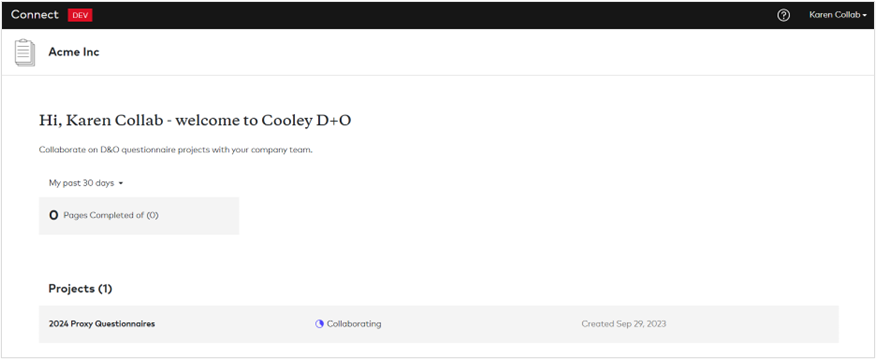
This will take you into the Overview screen.
Overview Tab
The Overview screen is a snapshot of the project’s progress and team members:
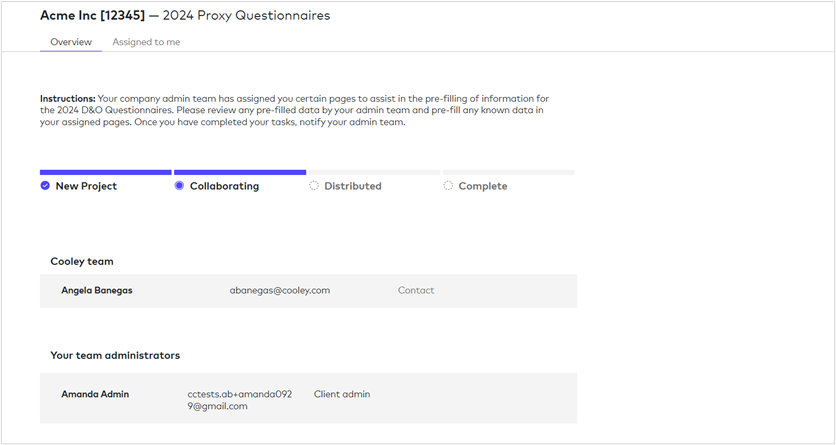
Status Bar – The status bar will update as the project progresses. The status will move to Distributed once at least one respondent questionnaire is distributed. The project will move to the Complete status once all respondent questionnaires have been signed and submitted.
Cooley team contact – The Cooley team will show the Cooley attorney(s) to whom questions regarding the process should be directed.
Your team administrators – Your team administrators will show your company administrators who are handling the D&O questionnaire process.
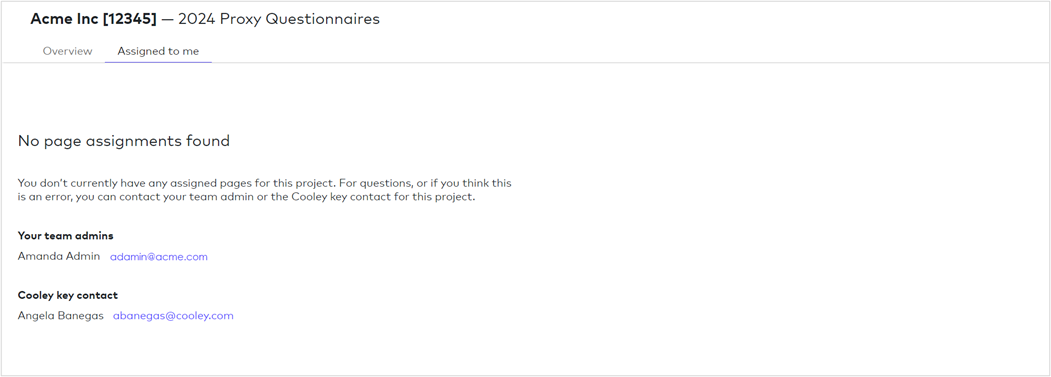
Completing the Assigned to me tab
As a collaborator, you will be assigned a series of boxes referred to as cards based on the information you can provide to help your administrators prefill the respondent questionnaires. Click on the Assigned to me tab at the top of the screen to see your assigned cards.
If you have been added to the project, but have not been assigned any cards by your administrators yet, you will see the following page:
The page will populate with your assigned cards once they have been assigned to you. Click on the card to view the information contained within:

When clicking into a card, the navigation list will be on the left with the relevant respondents and the form page will be on the right as follows:
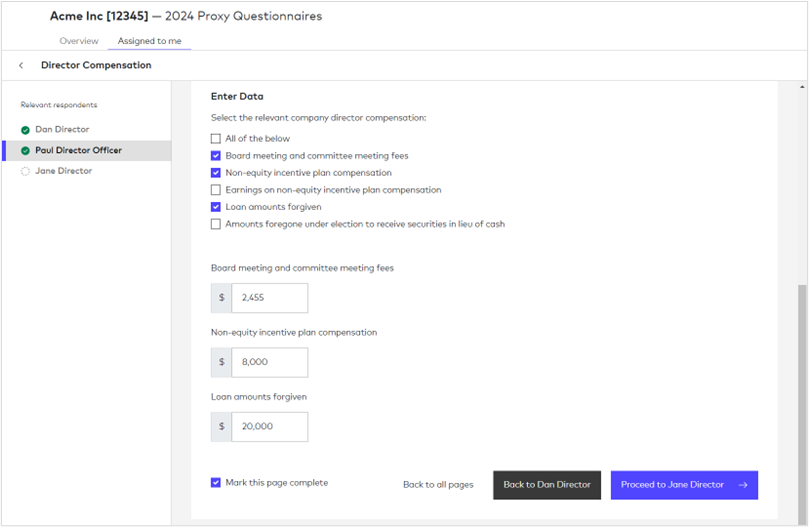
Navigating the assigned pages
There are several ways you can navigate through the pages:
Navigation list – you can select the relevant respondent in the navigation list on the left to move through the respondent pages as required.
Navigation buttons – You can use the Back to or Proceed to buttons at the bottom of the page to move backwards and forwards through the other relevant respondent pages in sequence.
Card view – You can return to the assigned cards tab by either clicking on the Back to all pages at the bottom of the page or click on the back arrow next to the page title in the upper left corner.
Marking page complete
For each respondent, when the page is complete, click the Mark this page complete box at the bottom of the form for the respondent. There is no requirement to pre-fill any or all of information on these pages before marking a page complete, though the more information that is pre-filled the more efficient the process will be for respondents. A checkmark will appear next to the respondent’s name in the navigation list once marked complete. Once all the respondent pages have been marked complete for the card, the card on the Assigned to me tab will get a checkmark.
Exhibit file uploads
Some of the cards will contain a section with the following options:
Defer to the respondent – no questions need to be answered by the company; the respondent will answer the questions.
Enter the data – a series of boxes will appear to enter the relevant data.
Upload a File – a file with the required information may be uploaded in lieu of entering the data. When selecting Upload file, the following will appear:
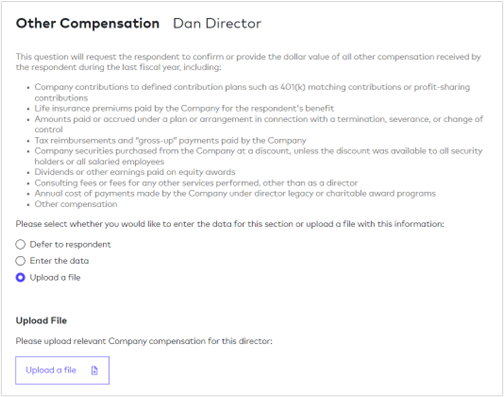
The required file format to be uploaded can be a PDF, Word document, Excel worksheet or an image (.JPG, .PNG) and will need to be stored locally on your computer. The image can be one taken with your mobile device. Click on the Upload a file button and the following dialogue box will appear:

Select Upload a new file from the drop-down options, locate the file you wish to use, and the following dialogue box will appear:

If the information applies only to this respondent, select This respondent only.
If the information applies to other Respondents, select Multiple respondents and select those respondents that the information has been provided for. You will need to go to each of these respondent pages and select the Upload a file option to see the file.
Note: You can remove the existing file by choosing a new file.
Select Add this file. This file will be added to the Respondent questionnaire as an exhibit.
Distributed state
Once a questionnaire is distributed to a respondent, you will no longer have access to the Assigned to me cards for further editing.
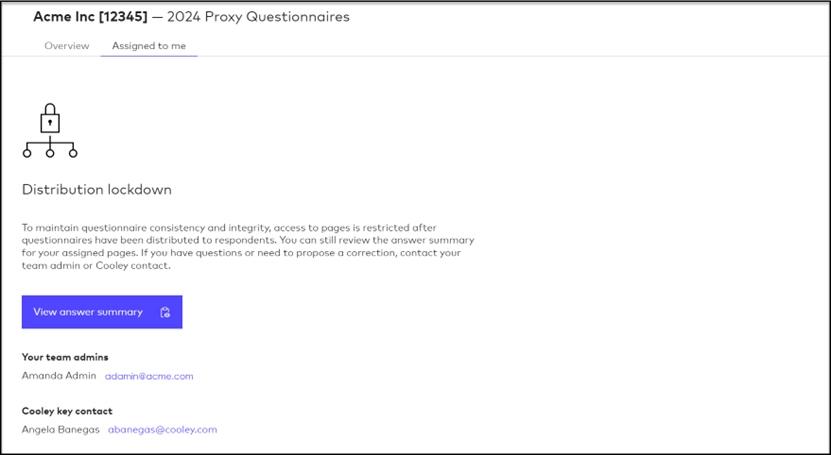
View answer summary – you can select View answer summary if you need to review your answers.
What’s next?
Your company admins will see the complete check mark from their view as you complete the cards.